Showing posts with label Wood Brain by Lindsay Zuelich. Show all posts

Friday, December 5, 2025

Wood Brain Makes a DIY Multi-Board Rack Build | Paddleboards, Surfboards, Kayaks, & More


This year has been an incredibly life changing in the best ways. Lindsay and I have been pushing our limits in Prone Paddling. As of today she's only a few more miles away from hitting 200 miles of paddling since June! I'm trying to finish off the year with 700 miles under my belt between surfing and prone paddling. For most of our paddle sessions we've been borrowing my buddies boards, but now we starting to collect our own. With the boards piling up its was time to build a rack for them. So Lindsay took on this challenge and created a rack that would safely store our boards while they were out of the water. So check out this video that shows how she put her ideas into a final budget friendly project.


I built a custom DIY prone paddleboard rack to store our 12' stock prone paddle boards, and the whole thing turned out way better than I expected. Most of the structure is made from simple 2x4 lumber, which kept the build cost super low and makes this project easy for anyone to recreate. The roof is a 16-foot lightweight cover made by ripping down a 16' long 2x4 in half and adding corrugated roofing panels for weather protection. Everything is painted in an exterior white paint for a clean, simple look, and I wrapped the rack arms in pipe foam insulation to protect the boards while loading and unloading. This design isn’t just for prone paddle boards—you can easily modify it to store kayaks, canoes, surfboards, and other long boards or watercraft. It’s a strong, straightforward solution to keep your gear organized and stored neatly along the side of a building, shed, or garage. And of course… I picked up a new board, so now I get to modify the rack again. 😂 Thanks for watching! If this build helped you out or gave you ideas for your own storage setup let me know I'd love to hear your feedback. 🔔 Don’t forget to like, comment, and subscribe for more creative builds and experiments! Stay Connected 📸 Instagram: @Wood_Brain 📧 Business Inquiries: WoodBrainLZ@gmail.com


Thanks again for checking it out and wish us both luck in clocking more miles next year!


Friday, November 15, 2024

Wood Brain Built Me The Ultimate Custom Hot Tub To Help My Post Surf Recovery!


Ok we all know surfing can really wear you out, and there's nothing better than helping that post surf recovery with a long soak in a hot tub!  So check out how Lindsay accomplished this luxury hot tub on a budget. Check this out:

Hey Friends, In this video, I’m building a custom redwood surround for our inflatable ‪@Colemancampfire‬ hot tub from ‪@lowes‬ To start I got a 1/2” foam base from amazon and trimmed 6 inches off the foam circle that I then used as my guide, traced the shape onto brown construction paper, and used it as a template for my 2x12 lumber. At first, I used a jigsaw to cut the arcs for the framing, but it quickly drained my batteries. Switching to the bandsaw was a game-changer! It gave me more accurate cuts and a stable base to work from. Once all the arcs were ready, I cut the 2x4 connecting pieces with my ‪@festoolusa‬ Kapex miter saw and used the ‪@KregToolCompany‬ Foreman jig to add pocket holes. After assembling the frame, I covered it with redwood boards and sealed everything with ‪@TotalBoat‬ Gleam varnish to protect and enhance the wood. Cutting the angled top boards took a little math, but thankfully, my friend Stephanie from ‪@uncommonoutpost‬ helped me figure it out. Once the top boards were cut, sanded, and secured with a brad nailer to the frame, I filled the holes with a mix of ‪@Titebond‬ glue and sawdust. To finish it off, I applied multiple coats of TotalBoat Gleam and Lust for a gorgeous, durable shine. For a fun touch, I added COB LED string lights to the inside and bottom of the surround for a cool night-time glow. I also modified the hot tub cover: I removed the snaps from the Coleman cover and used acetone to remove the labeling and separated the top section of the insulated cover from the bottom skirt, keeping the insulated skirt around the tub to help retain heat all the time. This project was so much fun, and I’m beyond proud of how it turned out! If you’re inspired to recreate this, I’d love to see your photos. Drop a comment below and let me know how you’d approach this build or what you enjoyed about my process. Until next time, friends, when we tackle another fun build together! Be sure to subscribe and stay tuned for my next videos. Link to shed roofing videos:    • How to Install Asphalt Shingles on a ...   Don't forget to like and subscribe for more woodworking tips and DIY upgrades! Thank you so much for watching this video. If you enjoyed this video, be sure to like and subscribe to my channel. Thanks in advance Friends! Be sure to follow me on Instagram & TikTok @Wood_Brain Business Inquires contact: WoodBrainLZ@gmail.com Huge Thank you to ‪@TotalBoat‬ for always being a huge supporter of my channel and for always making rad products to create fun projects like this. Be sure to check out their website for more cool products: http://totalboat.com/woodbrain TotalBoat products used: TotalBoat Gleam Varnish TotalBoat Lust Varnish Huge Thank you again to ‪@MendocinoForestProducts‬ for supplying the redwood for this project. Also Big Thank you to Lowe’s creator program for gifting the Coleman Hot Tub #lowespartner #lowesfinds Support me on Patreon: [https://www.patreon.com/Wood_Brain?fa...] Thank you to my awesome husband ‪@nobadtides‬ on Instagram for always being an amazing supporter of what I do. More info… Camera Used: Canon GX7 markii [https://amzn.to/48yIxFE] Tripod: [https://amzn.to/36z807A] Wheels for tripod: [https://amzn.to/3uZt8Nx] I edited this video myself (super proud) with Adobe Premiere Pro. I’ve learned everything thus far about editing via YouTube tutorials, and a little trial and error along the way. I’m always trying to keep learning something new with editing. Music: All music used was from Epidemic Sound.


Friday, September 27, 2024

Wood Brain Built Me The Ultimate Surf Shed!


Every surfers second biggest fear is running out of room for more surfboards (first biggest fear is sharks). And I was worried that maybe it was time to downsize my surfboard collection. So I had a heart to heart talk with Lindsay (Wood Brain) and she said it was time... Time to build something to hold more surfboards!!! 


Not only did she design and build it herself, she also added some fun touches that totally blew my mind. I absolutely love the magnetic whiteboard with all the surf photos- serious surf motivation. Is there anything you would change about this DYI surf shed build? Check this out:


Hey friends! In this video, I’m building a shed off the back of our garage for my husband, Eric, to safely and neatly store his surfboard collection and other sports equipment. He’s been storing his boards in a corner of the garage where I had built a sliding-door closet. However, because my workshop is also in the garage, the boards were collecting sawdust and debris. Plus, his collection has grown over the years, making it clear we needed more space.

To solve this, I teamed up with my friends ‪@84LumberCompany‬ to build a custom shed in a previously unused area behind the garage. I started by switching the hinges on our vinyl fence so the gate opened in the opposite direction, giving us better access to the build site.

From there, I built the platform base using pressure-treated 2x4s, leveling as needed, and added a ¾-inch plywood sheet for the floor, sealing everything with paint and stain. I framed the back and side walls with 2x4s and ½-inch plywood, painting and staining the materials before assembly. Then, I tackled the front wall, which included a large opening for the doors.

The shed’s sloped roof mimics the garage roof, so I framed it with pocket hole joinery to make installation easier. Once the walls and roof were framed, I added a ¾-inch plywood roof, sealed the soffits, and installed PVC fascia boards. I’ve linked the videos I used for the roofing techniques below. Once the shed was complete, I installed a surf rack to store all the surfboards, along with other fun items! Be sure to subscribe and stay tuned for my next video, where I’ll show you how I repurpose the extra garage space after building the surf shed. Don't forget to like and subscribe for more woodworking tips and DIY upgrades! Thank you so much for watching this video. If you enjoyed this video, be sure to like and subscribe to my channel. Thanks in advance Friends! Be sure to follow me on Instagram & TikTok @Wood_Brain Business Inquires contact: LindsayZ@influint.co Huge Thank you again to ‪@84LumberCompany‬ for sponsoring this video. Support me on Patreon: [https://www.patreon.com/Wood_Brain?fa...] Thank you to my awesome husband @nobadtides on Instagram for always being an amazing supporter of what I do.

Friday, January 5, 2024

Making a Wooden Surfboard: The Surfer's Dream Come True


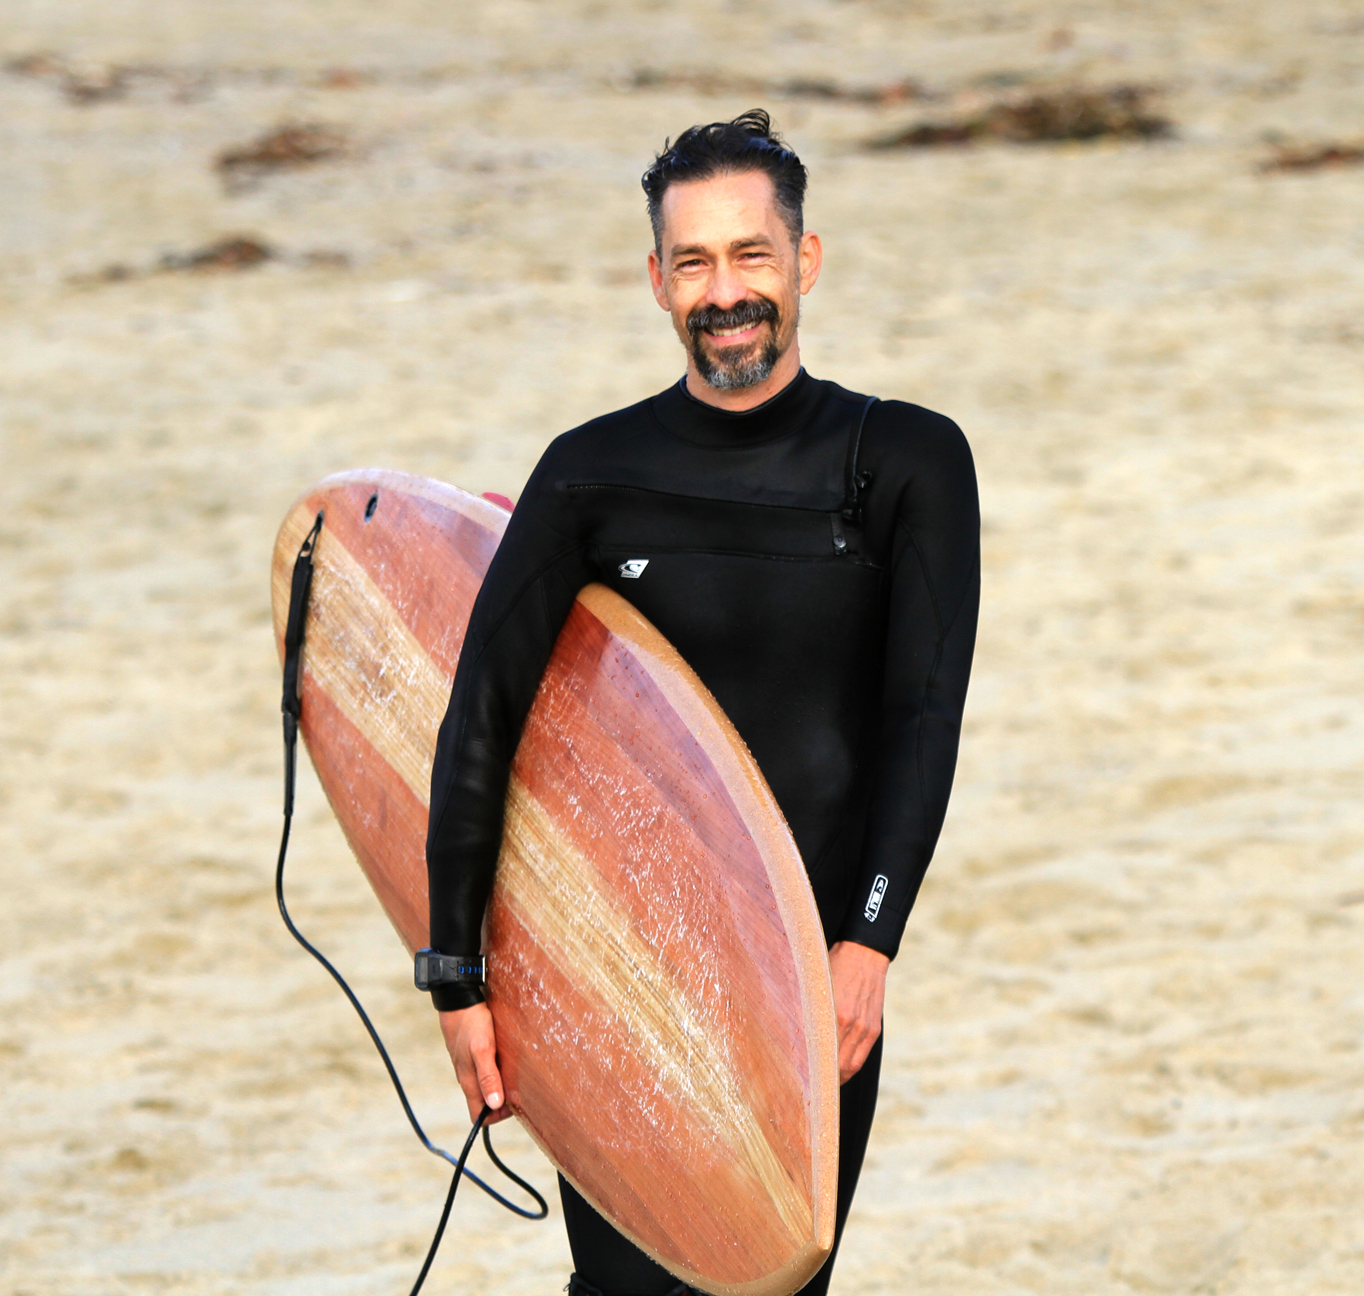
My wife and I built a wooden surfboard in our garage and it was surprisingly easy! We teamed up Jarvis Boards and TotalBoat and to make a custom 7'2" thruster out of redwood. I'm beyond stoked on how it turned out. It was so much fun working with Lindsay on this project that we already made plans to do a few more!

If you want to get a Kit from Jarvis Boards use code NoBadTides for 10% off your order.

Check out this video below to see the how it all came together... And I also added pictures at the bottom of the progress we made along the way. 

Hi there friends, in today’s video I’m going to show you how we made a hallow surfboard entirely made out of redwood. We partnered up with Jarvis Boards to create our surfboard from one of their new surfboard kits. This 7'2"was inspired by the legendary shaper Gerry Lopez's Pocket Rocket and designed by both Eric from Jarvis and Eric of NoBadTides. We started with building the frame of the kit using hot glue, that way if we had any changes to make, it was as easy as using a heat gun to warm it up and readjust the frame. Once the frame was built, I ripped down quarter inch strips on my tablesaw from a 2” x 6”x8’ redwood board to get our strips for the surfboard.

We glued each strip down using polyurethane glue and held it in place with clamps. Each strip took about an hour to fully dry before we could unclamp it and start a new strip, which was the most time-consuming process of the entire build. Once we had all of the strips glued down I use my oscillating tool to cut the board to shape, and then a flush trim router bit with a router to clean up the board. Then we cut two strips of 3/8 inch thick cork for the rails and wrapped it around the board twice using heavy duty spray adhesive. Then I trimmed down the cork rails, using my oscillating tools, and had Eric shape the rails using a Shinto saw rasp.

Once the board was shaped and sanded down, we gave a thin coat of penetrating epoxy from Total Boat to the wood to help soak in to the grain before giving our fiberglass coat. We fiberglass the top of the board first and used a cut lap with tape on the underside making it easy for clean up once the fiberglass was 75 to 80% cured we used a sharp razor blade to cut away the excess on the bottom of the board, a light standing on the edge and then we rinse and repeat the same process with the fiberglass. Once everything was fully cured we gave a hot coat of epoxy over the top to bring out all the colors, and it really made the board shine.

We let it fully cure for a few more days and then sanded down to 320 one more time before giving it a nice coat of Halcyon varnish once the board was fully cured it was time to take her out in the water for a first maiden voyage. This was such a fun project and I can’t wait to make another board!!! This is a simple and easy project, and I highly recommend building one, be sure to tag me when you do make one of your own. Thank you so much for watching today's video. If you enjoyed this video be sure to like and subscribe to my channel. Here’s link to the surfboard kit: https://jarvisboards.com/collections/... Use Code: WOODBRAIN for a 10% discount. Thanks in advance Friends Be sure to follow me on Instagram & TikTok @Wood_Brain Business Inquires contact: lindsayz@influint.co Support me on Patreon: https://www.patreon.com/Wood_Brain?fa... Thank you to Jarvis Boards for being there every step of the way during the building process and being so extremely helpful as well as creating such fun surfboard kits, can't wait to build another one. Thank you to Total Boat for always being a huge supporter of my channel and for always creating rad products to create fun projects like this. Use Code: WOODBRAIN for a 10% discount. Thank you to my awesome husband @nobadtides on Instagram for all ways being an amazing supporter of what I do. More info… Camera Used: Canon GX7 markii https://amzn.to/48yIxFE Tripod: https://amzn.to/36z807A Wheels for tripod https://amzn.to/3uZt8Nx


Tuesday, August 16, 2022

Ebikes Make Beach Trips Awesome!

Photo by Lindsay Zuelich
 

I jumped on the opportunity to go for an adventurous trip to the beach on some new Ebikes from Aventon. My wife usually only surfs when we are vacationing in the tropics, but she agreed to be my beach photographer and also brought along and extra Gerry Lopez Surftech surfboard for me! Now I have the Gerry Lopez 6'8 Little Darlin and the 8'0 Pocket Rocket by Surftech and a new wetsuit from 7Till8 ....I'm beyond Stoked! 

Check out how it all happened here:

Aventon Adventure Vlog 06

Friends, Welcome back to Vlog 06, it's been a minute! I'm stoked to be back with this fun adventure with Aventon. I've wanted an electric bike for the longest! I love riding bikes, it's one of my favorite ways to adventure outdoors. So when I heard my buddy Ben Paik of @Woby Design was going to return an E-bike from Aventon that was just a little to big to fit in his new van conversion build out, I jumped at the chance to take it off his hands. I reached out to Aventon and Explained how much I'd love to try out their Sinch E-bike and give my honest review via a vlog. Aventon is such a rad company and they agreed to let me test out the Aventon Sinch foldable E-bike. I picked up the red E-bike from Ben's shop and took her for a test spin around the block and instantly fell in LOVE. I named her Ruby that day. After a few days of cruising around with the Sinch E-bike, my Husband @No Bad Tides by Eric Cedeno was having trouble keeping up with me and Ruby on his regular pedal bike. So I wrote to Aventon again and explained how I'd love to add a second Sinch bike to our family so that my husband could keep up with me. I went back for another adventure to Ben's shop to pick up the boxed e-bike and immediately unboxed her once I got home. The boxed e-bike was a stunning emerald green that Eric named Jade. Once we were all charged up we took them for a few spins around town. Then we really hooked up our bikes with surf racks and cruised to the beach for a surf photo session. Big thank you and shout to @kevfoto2012 on Instagram for catching some epic shots of Eric surfing in the water, while I capture him on shore. I can't wait to take the Aventon E-bike camping and to the desert, I know we'll have many more adventures and I can't wait. Thank you again Friends for watching today's Vlog and until our next video together. Cheers it up! Big Thank you to Aventon for adding us to the family, we love our new bikes! be sure to check out there website: http://aspireiq.go2cloud.org/aff_c?of... Huge shout out and Thank you to my Buddy Ben Paik of @Woby Design he's the best! check out his channel and follow along on his new van build its going to be epic! Also follow him on Instagram @Woby Design Business inquires contact: WoodBrainLZ@gmail.com


Photo by Lindsay Zuelich

I tore my right knee in May of 2021 and I need surgery so I've been wearing a knee brace over my suit as extra support when I'm surfing. That's really been a game changer for me because it has allowed my to ride way move waves plus reduced the swelling in my knee after all that activity. 

Photo by Lindsay Zuelich

That's Kevfoto2012 and Jerry_Averill_Epic_Shots on the inside with GoPro's taking in the action. 


Photo by Lindsay Zuelich

I love swapping boards mid-session! The 8'0 Pocket Rocket was awesome as always, and it was time to bust out the 6'8" Little Darlin to see what magic it could do. There's something really special about being able to ride two Gerry Lopez boards in the same day! 

Photo by Lindsay Zuelich

I had blast surfing in my new wetsuit by 7Till8, and cruising around on the Aventon E-Bikes! I'm definitely going to be doing this more often!